
补充:事件绑定
上一节,我们介绍的事件绑定主要是直接绑定方法,其实,绑定方法的等号后面可以写任意js代码。
<button type="button" class="btn btn-primary" (click)="$event.preventDefault();">Primary</button>
<button type="button" class="btn btn-primary" (click)="text = 'a';">Primary</button>
<button type="button" class="btn btn-primary" (click)="$event.preventDefault();onClick()">Primary</button>
ng命令生成组件
在angular中,通过ngCli生成组件其实是一件很简单的事情。当然,我们直接复制已有的组件,再修改文件名,也是可以的。但是,这样做不会自动引入我们所创建的新组建。所以,ng命令是我们创建组件的首选。
接下来,我们将在src/app/components/创建一个dialog组件。
/**
 * 语法:
 * ng generate component <name> [options]
 * ng g c <name> [options] (简写)
 * 常用options:
 * --export=true|false         // true,将exports(导出)这个组件
 * --inlineStyle=true|false    // 样式是否为内联形式
 * --inlineTemplate=true|false // 模板文件(html)是否为内联形式
 * --skipTests=true|false      // 是否安装单元测试文件
 * /
// cd到项目根目录,执行下面命令:
ng g c components/dialog
执行命令将在src/app下面自动生成components/dialog文件夹,里面包含三个文件:
- dialog.component.html
- dialog.component.scss
- dialog.component.ts
并且,在src/app/app.module.ts中自动引入了dialog组件:
// src/app/app.module.ts
...
import { DialogComponent } from './components/dialog/dialog.component';
@NgModule({
  declarations: [
    AppComponent,
    DialogComponent
  ],
  // ...
})
...
调用组件:
// app.component.html
<app-dialog></app-dialog>
就这么简单,我们已经创建了第一个自定义组件dialog。
组件传值
下面我们将通过一个小的实例,来讲述组件之间的简单传值。
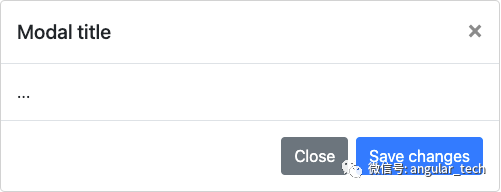
首先,我们拷一段bootstrap的代码到dialog.component.html
<div class="modal fade show d-block" id="exampleModal" tabindex="-1" role="dialog" aria-labelledby="exampleModalLabel" aria-hidden="true">
<div class="modal-dialog modal-dialog-centered">
<div class="modal-content">
<div class="modal-header">
<h5 class="modal-title" id="exampleModalLabel">Modal title</h5>
<button type="button" class="close" data-dismiss="modal" aria-label="Close">
<span aria-hidden="true">×</span>
</button>
</div>
<div class="modal-body">
...
</div>
<div class="modal-footer">
<button type="button" class="btn btn-secondary" data-dismiss="modal">Close</button>
<button type="button" class="btn btn-primary">Save changes</button>
</div>
</div>
</div>
</div>
页面将是这个样子:
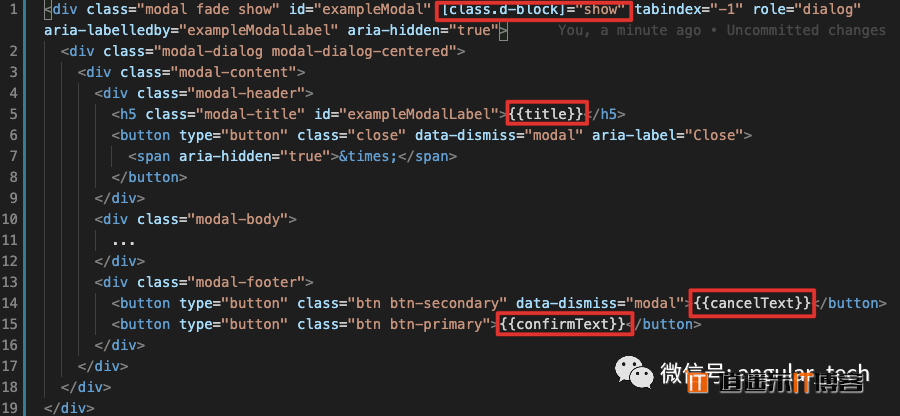
我们将使用@Input()、@Output()两个装饰器来动态设置title、按钮文字,以及组件通过点击关闭、确定、取消等操作时,向父组件传递信息。
@Input()
定义:一个将类字段标记为输入属性的装饰器。该属性绑定到DOM模版,当变更检测时,Angular 会自动使用这个 DOM 属性的值来更新此数据属性。(通常用作父组件向子组件传值)
创建属性:
// dialog.component.ts
...
// 引入:(其实,这个一般都不用手动引入,通过编辑器自动引入会更方便)
import { Component, Input, OnInit } from '@angular/core';
export class DialogComponent implements OnInit {
  // 定义所需变量,并初始化默认值
  @Input() show = true; // 通过控制d-block来控制模态框显示与隐藏
  @Input() title = '标题...';
  @Input() confirmText = '确定';
  @Input() cancelText = '取消';
  // ...
}
组件绑定属性:
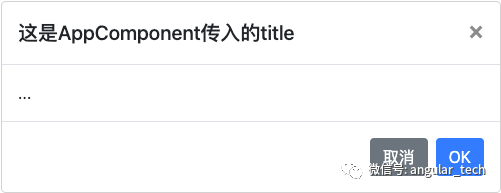
父组件传入属性:
// app.component.ts
...
export class AppComponent {
  dialogTile = "这是AppComponent传入的title";
  dialogShow = false;
}

// app.component.html
...
页面也对应发生改变:
@Output()
定义:一个将类字段标记为输出属性的装饰器。凡是绑定到输出属性上的 DOM 属性,Angular 在变更检测期间都会自动进行更新。(通常用作子组件向父组件传值)
按照正常的思路,我们应该先给组件的 DOM 元素绑定一些事件:
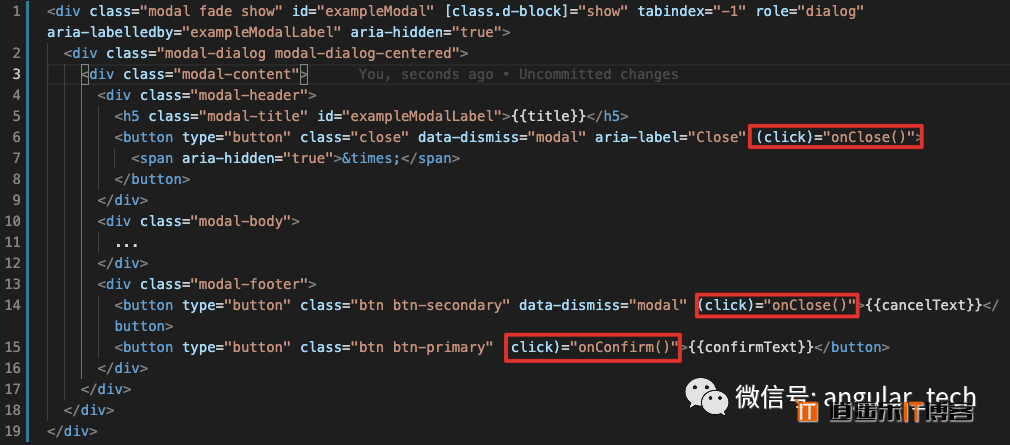
事件有了,那么,父组件怎么才能知道是哪个事件呢?所以,我们要通过@Output给每个点击事件起个名字(注册自定义事件):
// dialog.component.ts
...
// 引入:(其实,这个一般都不用手动引入,通过编辑器自动引入会更方便)
import { Component, EventEmitter, Input, OnInit, Output } from '@angular/core';
export class DialogComponent implements OnInit {
  // ...
  // 注册了两个自定义事件
  // <void> ==>事件不需要参数
  @Output() closed = new EventEmitter<void>();
  @Output() confirm = new EventEmitter<void>();

  onConfirm() {
    this.confirm.emit();
  }
  onClose() {
    this.closed.emit();
  }
  // ...
}
现在,自定义事件有了,要使父组件知道,我们就需要将事件暴露出去,并且在父组件中处理这些事件:
// app.component.html
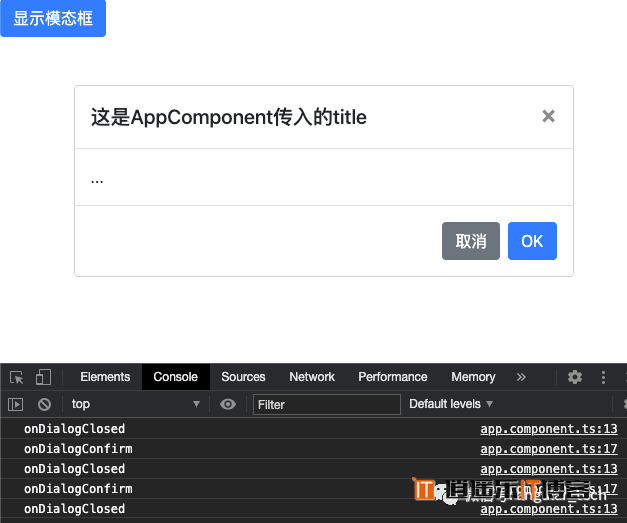
<button class="btn btn-primary btn-small" (click)="showDialog()">显示模态框</button>
<app-dialog
[title]="dialogTile"
[show]="dialogShow"
confirmText="OK"
(closed)="onDialogClosed()"
(confirm)="onDialogConfirm()"
></app-dialog>
// app.component.ts
...
export class AppComponent {
// ...
onDialogClosed() {
console.log('onDialogClosed');
this.dialogShow = false;
}
onDialogConfirm() {
console.log('onDialogConfirm');
}
showDialog() {
this.dialogShow = true;
}
}
页面查看效果,可以看出,我们想要的功能实现了:
总结:
- 生成组件命令ng generate component <name> [options]
- 父组件向子组件传值:子组件:@Input() 变量名 = 默认值父组件:<app-child [变量名]=“父组件里的变量”></app-child>
- 子组件向父组件传值:子组件:@Output() 自定义事件名 = new EventEmitter<void>();父组件:<app-child (自定义事件名)=“父组件里的方法”></app-child>
本文转载自: Angular 教程,版权归原作者所有,本博客仅以学习目的的传播渠道,不作版权和内容观点阐述,转载时根据场景需要有所改动。


最新评论