今天在泡博客的时候发现了张戈童靴基于小熊的wordpress利用代码来实现缓存,非常不错,值得传播一下,给那些富有折腾精神,并具有一定php能力的童靴。
原文:张戈博客《WP Super Cache静态缓存插件纯代码版(兼容多域名网站)》
原来的代码无法区分多个域名,从而会导致移动站无法跳转的情况。经过张戈童靴的努力研究解决了整个人体,我们应该感谢张戈童靴的折腾精神,加油!
以下为张哥博客原文:
一、何为多域名?
正式分享之前,我必须说清楚一下,什么是多域名网站!
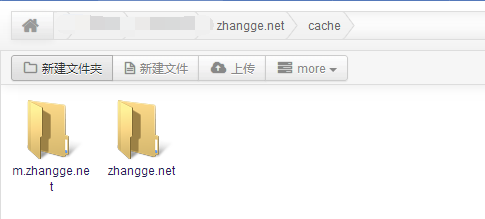
熟悉的朋友,应该知道张戈博客除了zhangge.net之外,还有一个m.zhangge.net的移动域名。当js检测到是移动端的UA时,将会自动跳转到m.zhangge.net,从而实现移动端的适配跳转。
以前分享这个跳转的时候,我下意识的以为,这种跳转可以兼容任意缓存,比如cos-html-cache等。实际上发现,这种跳转只能兼容wp super cache!原因是:只有wp super cache 是分域名来储存缓存文件的,其他插件包括代码版都不区分域名,统统存到同一个路径,于是就出现了无限死循环跳转的窘迫,因为缓存文件是同一个,跳了之后还是PC的缓存,怎么跳都跳不出这个死循环!!(估计又有人看不懂了,不过无所谓,真正需要的时候肯定看得懂!)
言归正传,既然wp super cache可以兼容多域名网站,那代码版肯定也可以做到!测试了十来分钟,就搞定了!存放结构都和wp-super-cache一样!
下面分享一下详细步骤:
<?php
//原缓存路径拼接当前请求域名的文件夹,从而可以区分m.zhangge.net还是zhangge.net,或是其它...
define('CACHE_ROOT', dirname(__FILE__).'/cache/'.$_SERVER['HTTP_HOST']);
define('CACHE_LIFE', 86400); //缓存文件的生命期,单位秒,86400秒是一天
define('CACHE_SUFFIX','.html');  //缓存文件的扩展名,千万别用 .php .asp .jsp .pl 等等

//首页以index.html缓存,分页以request/*html缓存,比如1234.html/index.html(同wp super cache)
if($_SERVER['REQUEST_URI'] == '/'){
    $file_name  = "index".CACHE_SUFFIX;    //缓存文件名
    $cache_dir  = CACHE_ROOT;
} else {
    $file_name  = 'index.html';
    //过滤带参数的地址,避免重复缓存浪费资源:
    $target_url = preg_replace('/(\/comment|page|#|\?).*$/','',$_SERVER['REQUEST_URI']);
    $cache_dir  = CACHE_ROOT.$_SERVER['REQUEST_URI'].'/';
}

//缓存文件存放路径
$cache_file = $cache_dir.'/'.$file_name;

//GET方式请求才缓存,缓存黑名单:绕过WP搜索、feed、sitemap、page分页及tag页面(更多黑名单直接用分隔符|隔开即可!)
if($_SERVER['REQUEST_METHOD']=='GET' && !preg_match_all('/(\?s=|feed|sitemap|page|tag)/',$_SERVER['REQUEST_URI'],$matches)){  if(file_exists($cache_file) && time() - filemtime($cache_file) < CACHE_LIFE){   //如果缓存文件存在,并且没有过期,就把它读出来。
        $fp = fopen($cache_file,'rb');
        fpassthru($fp);
        fclose($fp);
        exit();
    }
    elseif(!file_exists($cache_dir)){
        if(!file_exists(CACHE_ROOT)){
            mkdir(CACHE_ROOT,0777);
            chmod(CACHE_ROOT,0777);
        }
        mkdir($cache_dir,0777);
        chmod($cache_dir,0777);
    }
    function auto_cache($contents){         //回调函数,当程序结束时自动调用此函数
        global $cache_file;
        $fp = fopen($cache_file,'wb');
        fwrite($fp,$contents);
        fclose($fp);
        chmod($cache_file,0777);
        clean_old_cache();                  //生成新缓存的同时,自动删除所有的老缓存。以节约空间。
        return $contents;
    }
    function clean_old_cache(){
        chdir(CACHE_ROOT);
        foreach (glob("*/*".CACHE_SUFFIX) as $file){
           if(time()-filemtime($file)>CACHE_LIFE){
               unlink($file);
           }
        }
    }
    ob_start('auto_cache');                 //回调函数 auto_cache
}
else{
    if(file_exists($cache_file)){           //file_exists() 函数检查文件或目录是否存在。
        unlink($cache_file);                //不是GET的请求就删除缓存文件。
    }
}
?>
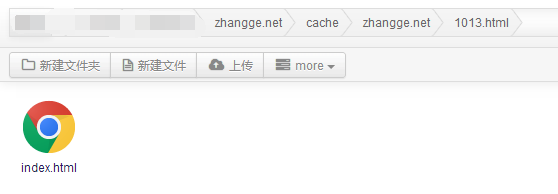
以下是三种缓存机制中,缓存文件存放路径的对比:
①、原缓存代码存放路径为:
/网站根目录/cache/请求路径前2位MD5值/MD5字符串(很难区分是哪篇文章!)

②、#nginx下开启mod_rewrite模式时,wp super cache的缓存路径是:
/网站根目录/wp-content/cache/supercache/请求域名/请求路径/index.html

③、我修改后的缓存代码存放路径则变成:
/网站根目录/cache/请求域名/请求路径/index.html
部署方法还是和原代码一致:
将以上代码保存为cache.php上传到网站根目录,然后修改网站根目录的index.php,在第一个<?php 后添加代码:
require('cache.php');
现在,只要刷新一下网站前台,就能在cache里面看到内容了,而且结构和WP Super Cache一致:

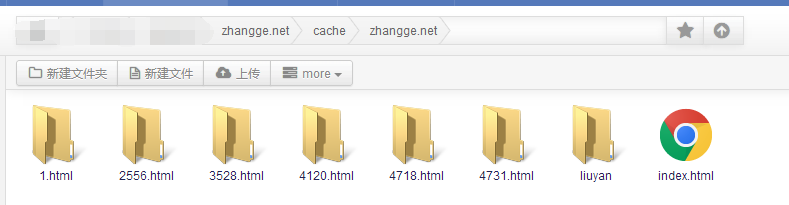
很明显,我参考了WP Super Cache的存放路径,请求域名的不同,存放位置也会不同,从而避免了多个域名请求到同一个缓存文件,造成跳转死循环的问题!(不得不说WP Super Cache想得很周到!)
当然,如果你想改成和WP Super Cache一样的存放路径,只需要将第二行代码如下修改即可:
define('CACHE_ROOT', dirname(__FILE__).'/wp-content/cache/'.$_SERVER['HTTP_HOST']);
代码中已加入缓存黑名单功能,如果想禁止某页面缓存,只要将该页面的关键字眼加入到如下代码,比如我要禁止缓存留言板,也就是http://zhangge.net/liuyan,那么如下新增:
//使用分隔符 | 隔开新增的关键词即可:
!preg_match_all('/(\?s=|feed|sitemap|page|tag|liuyan)/',$_SERVER['REQUEST_URI'],$matches)
最新补充:今早查看缓存时,大小居然高达45M!进去看了下,只能惊叹那些无聊的小人,真特么多!发一个部分截图,你们感受下:
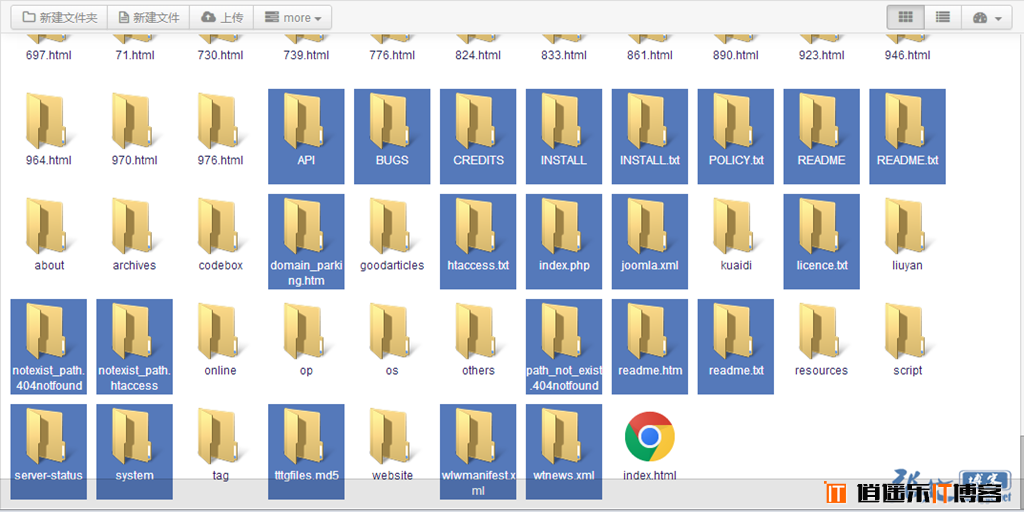
各种恶意访问,真是居心叵测!如果非常多,建议将关键词加入到缓存黑名单,避免缓存太多占空间。
三、更多补刀
①、找回CDN功能
用过WP Super Cache的朋友,应该知道这个插件还自带CDN功能,很全面!那么换成代码版,当然也不能漏掉这个实用功能!
正好歧路亡羊博客分享了水煮鱼的七牛CDN插件的代码版,直接拿来主义,然后强迫症缩进一下:
//水煮鱼的七牛CDN插件代码版
define('FocusCDNHost','http://zhangge.net'); //wordpress网站网址
define('FocusCDNRemote','http://static.zhangge.net'); //cdn域名
define('FocusCDNIncludes','wp-content,wp-includes'); //设置加速目录
define('FocusCDNExcludes','.php|.xml|.html|.po|.mo');  //设置文件白名单
define('FocusCDNRelative','');
function do_cdnrewrite_ob_start() {
    $rewriter = new FocusCDNRewriteWordpress();
    $rewriter->register_as_output_buffer();
}
add_action('template_redirect', 'do_cdnrewrite_ob_start');
class FocusCDNRewriteWordpress extends FocusCDNRewrite
{
    function __construct() {
        $excl_tmp = FocusCDNExcludes;
        $excludes = array_map('trim', explode('|', $excl_tmp));
        parent::__construct(
            FocusCDNHost,
            FocusCDNRemote,
            FocusCDNIncludes,
            $excludes,
            !!FocusCDNRelative
        );
    }
public function register_as_output_buffer() {
    if ($this->blog_url != FocusCDNRemote) {
        ob_start(array(&$this, 'rewrite'));
        }
    }
}
class FocusCDNRewrite {
    var $blog_url    = null;
    var $cdn_url     = null;
    var $include_dirs   = null;
    var $excludes    = array();
    var $rootrelative   = false;
function __construct($blog_url, $cdn_url, $include_dirs, array $excludes, $root_relative) {
    $this->blog_url   = $blog_url;
    $this->cdn_url    = $cdn_url;
    $this->include_dirs  = $include_dirs;
    $this->excludes   = $excludes;
    $this->rootrelative  = $root_relative;
}
protected function exclude_single(&$match) {
    foreach ($this->excludes as $badword) {
        if (stristr($match, $badword) != false) {
            return true;
        }
    }
    return false;
}
protected function rewrite_single(&$match) {
    if ($this->exclude_single($match[0])) {
        return $match[0];
    } else {
    if (!$this->rootrelative || strstr($match[0], $this->blog_url)) {
        return str_replace($this->blog_url, $this->cdn_url, $match[0]);
    } else {
        return $this->cdn_url . $match[0];
        }
    }
}
protected function include_dirs_to_pattern() {
    $input = explode(',', $this->include_dirs);
    if ($this->include_dirs == '' || count($input) < 1) {
        return 'wp\-content|wp\-includes';
    } else {
        return implode('|', array_map('quotemeta', array_map('trim', $input)));
    }
}
public function rewrite(&$content) {
    $dirs = $this->include_dirs_to_pattern();
    $regex = '#(?<=[(\"\'])';
    $regex .= $this->rootrelative ? ('(?:'.quotemeta($this->blog_url).')?') : quotemeta($this->blog_url);
    $regex .= '/(?:((?:'.$dirs.')[^\"\')]+)|([^/\"\']+\.[^/\"\')]+))(?=[\"\')])#';
    return preg_replace_callback($regex, array(&$this, 'rewrite_single'), $content);
    }
}
根据实际情况修改以上代码的2~3行,最后粘贴到主题目录下的functions.php文件的最后一个?>之前即可。
如果和张戈博客一样,有一个PC主题,还有个移动主题,那么2个都需要添加,但是要注意修改不同的域名:
比如pc主题 用http://zhangge.net,而移动主题用http://m.zhangge.net,总之依葫芦画瓢就行!!!
这样就实现了之前WP Super Cache的CDN功能。
②、找回Mod_rewrite模式
如果想要在nginx下实现mod_rewrite模式,需要在nginx下新增一些规则,这个在张戈博客已经分享过(相关文章)
开启这个模式的好处是,当存在静态缓存文件时,nginx将直接调用缓存文件给浏览器,而不再需要经过php-fpm模块,从而加载速度成倍增长!
那本文分享的代码版能否实现这个功能呢?依然是那句话,有想法,技术都不是问题!
很简单,只要稍微修改一下之前分享的nginx下的mod_rewrite规则即可:
location / {
           #缓存规则开始!
           # 如果请求的文件已存在,直接返回
           if (-f $request_filename) {
               break;
           }
           set $supercache_file '';
           set $ihttp_host '';
           set $supercache_uri $request_uri;
           if ($supercache_uri ~ ^(.+)$) {
               #请注意:下面这行代码的路径对应缓存代码中的CACHE_ROOT定义的路径:
               set $supercache_file /cache/$http_host$1/index${ihttp_host}.html;
           }
           # 只有当缓存文件存在时,才进行 rewrite
           if (-f $document_root$supercache_file) {
               #rewrite ^(.*)$ $supercache_file break;
               rewrite ^ $supercache_file last;
           }
           # 所有其他请求,转给 wordpress 处理
           if (!-e $request_filename) {
               rewrite . /index.php last;
           }
           #缓存规则结束!
           #下面部分是nginx原有规则....
}
只要将以上代码中的开始到结束之间的代码,添加到nginx配置文件中location / 模块原有规则之前即可。
保存之后,执行如下类似命令重载nginx:
#先测试配置是否正确:
/usr/local/nginx/sbin/nginx -t
#若显示success,则继续重载nginx:
/usr/local/nginx/sbin/nginx -s reload
完成以上操作,当有人访问到你的网站的缓存文件时,无需经过index.php,直接由nginx 判断并回应给用户,和之前WP Super Cache的机制一摸一样!
③、提交评论时清除文章缓存
这是张戈博客之前的文章就分享过的方法(相关文章),这次只要稍微修改下路径就可以用了!
//有人评论将自动删除已存在缓存
$post_data = get_post($post->ID, ARRAY_A);
$slug = $post_data['post_name'];
$cache_s = site_url()."/cache/".$_SERVER['HTTP_HOST']."/".$post->ID.".html/index.html";
$cache_sd = site_url()."/cache/".$_SERVER['HTTP_HOST']."/".$post->ID.".html";
$cache_p = site_url()."/cache/".$_SERVER['HTTP_HOST']."/".$slug."/index.html";
$cache_pd = site_url()."/cache/".$_SERVER['HTTP_HOST']."/".$slug;
if (file_exists($cache_s)) {
    unlink($cache_s);
    rmdir($cache_sd);
}
if (file_exists($cache_p)) {
    unlink($cache_p);
    rmdir($cache_pd);
}
修改主题目录下的comment-ajax.php,将以上代码添加到以下代码之后即可实现提交评论时删除当前文章的缓存:
do_action('pre_comment_on_post', $comment_post_ID);
四、多后遗症
部署此功能之后,各种问题迎面而来,我也真是醉了!
①、若主题有登陆状态显示,那缓存之后,无论谁打开都显示已登录;
②、WordPress原生评论框已登录状态将带入缓存当中,效果同上;
③、管理员回复评论也会发送邮件给管理员(①、②项处理OK之后发现的问题);
④、无法保存评论者信息,这个是开启缓存之后的诟病,之前已分享过变相解决办法(相关文章)。
对于①、②,很显然缓存的时候将用户登陆状态一起缓存了,导致任何人打开都是已登录,你醉了么?
解决办法:
针对①、找到主题显示状态的位置,修改登陆相关代码!比如知更鸟主题主题下的time.php和login.php;
针对②、找到主题下的comments.php文件,删除状态判断代码,主体不同,可能会有所差异,粗略贴一下:
<!-- 需要删除的代码(开始) -->
<?php if ( $user_ID ) : ?>
      <!-- 此处是注册用户已登录的相关代码 -->
<?php elseif ( '' != $comment_author ): ?>
      <!-- 此处是曾经留过言的相关代码 -->
<?php endif; ?>
   <!-- 下面则是位置用户的相关代码 -->
<!-- 需要删除的代码(结束) -->

<!-- 以下部分只要删除判断的第一行和最后一行的php部分,如下: -->
<?php if ( ! $user_ID ): ?>
   <!-- 之间的代码请勿删除!!! -->
<?php endif; ?>
看起来相当费解,我还是贴一下我最后修改的代码吧!仅供参考:
<?php
 if ('comments.php' == basename($_SERVER['SCRIPT_FILENAME']))
 die ('Please do not load this page directly. Thanks!');
 if (!empty($post->post_password)) {
 if ($_COOKIE['wp-postpass_' . COOKIEHASH] != $post->post_password) {  // and it doesn't match the cookie
 ?>
 <p class="nocomments">必须输入密码,才能查看评论!</p>
 <?php
 return;
 }
 }
 $oddcomment = '';
?>
 <?php if ('open' == $post->comment_status) : ?>
 <div id="respond">
 <h3>给我留言</h3>
 <div class="cancel-comment-reply">
 <small><?php cancel_comment_reply_link(); ?></small>
 </div>
 <?php if ( get_option('comment_registration') && !$user_ID ) : ?>
 <p><?php print '您必须'; ?><a href="<?php echo get_option('siteurl'); ?>/wp-login.php?redirect_to=<?php echo urlencode(get_permalink()); ?>"> [ 登录 ] </a>才能发表留言!</p>
 <?php else : ?>
                <!-- 需要删除的代码大概在这个位置 -->
 <form action="<?php echo get_option('siteurl'); ?>/wp-comments-post.php" method="post" id="commentform">
 <div id="comment-author-info">
 <p>
 <input type="text" name="author" id="author" class="commenttext" value="<?php echo $comment_author; ?>" size="22" tabindex="1" />
 <label for="author">昵称<?php if ($req) echo " *"; ?></label>
 </p>
 <p>
 <input type="text" name="email" id="email" class="commenttext" value="<?php echo $comment_author_email; ?>" size="22" tabindex="2" />
 <label for="email">邮箱<?php if ($req) echo " *"; ?></label>
 </p>
 <p>
 <input type="text" name="url" id="url" class="commenttext" value="<?php echo $comment_author_url; ?>" size="22" tabindex="3" />
 <label for="url">网址</label>
 </p>
  <?php if ( '' == $comment_author )spam_protection_math();?>
 </div>
      <?php endif; ?>
      <div class="clear"></div>
 <p><textarea name="comment" id="comment" tabindex="4"></textarea></p>
 <div class="submitted">
 <input class="submit" name="submit" type="submit" id="submit" tabindex="5" value="提交留言"/>
 <input class="reset" name="reset" type="reset" id="reset" tabindex="6" value="<?php esc_attr_e( '重写' ); ?>" />
 <input type="checkbox" id="saveme" value="saveme" checked="checked" style="margin-left:20px;" /><label for="comment_mail_notify">记住我</label></p>
 <?php comment_id_fields(); ?>
 </div>
 <script type="text/javascript">
 $(document).keypress(function(e){
 if(e.ctrlKey && e.which == 13 || e.which == 10) {
 $(".submit").click();
 document.body.focus();
 } else if (e.shiftKey && e.which==13 || e.which == 10) {
 $(".submit").click();
 }
 })
 </script>
 <?php do_action('comment_form', $post->ID); ?>
    </form>
 <div class="clear"></div>
  </div>
 <?php endif;?>
<?php if ($comments) : ?>
<!-- 引用 -->
<?php
  $numPingBacks = 0;
  $numComments  = 0;
  foreach ($comments as $comment)
    if (get_comment_type() != "comment") $numPingBacks++; else $numComments++;
?>
 <h2 id="comments">共有
 <?php
 $my_email = get_bloginfo ( 'admin_email' );
 $str = "SELECT COUNT(*) FROM $wpdb->comments WHERE comment_post_ID = $post->ID
 AND comment_approved = '1' AND comment_type = '' AND comment_author_email";
 $count_t = $post->comment_count;
 $count_v = $wpdb->get_var("$str != '$my_email'");
 $count_h = $wpdb->get_var("$str = '$my_email'");
 echo $count_t, " 条留言 访客:", $count_v, " 条 博主:", $count_h, " 条 ";
 ?>
      <?php if($numPingBacks>0) { ?>引用:<?php echo ' '.$numPingBacks.'';?><?php } ?>
 </h2>
 <ol class="commentlist"><?php wp_list_comments('type=comment&callback=mytheme_comment&end-callback=mytheme_end_comment'); ?></ol>
 <div class="navigation_c">
 <div class="previous"><?php paginate_comments_links(); ?></div>
 </div>

 <?php else : ?>
 <?php if ('open' == $post->comment_status) : ?>
 <?php else : ?>
 <p class="nocomments">抱歉!评论已关闭.</p>
 <?php endif; ?>
 <?php endif; ?>
针对问题③,需要在发送邮件时先做一个判断,由于缓存无法取得用户登陆状态,所以我使用邮箱来判断是否发送:
if($to != 'ge@zhangge.net'){
    wp_mail( $to, $subject, $message, $headers );
}
如果评论者邮箱是博主自己的邮箱,则不发送邮件!由于每个主题的情况都不一样,所以这个方法只能参考,而无法通用!如果,你的博客用了代码版的SMTP功能,那么就可以使用这个方法!
五、写到最后
这篇文章是在我一边测试、一边记录的情况下完成的!本以为会很简单,结果状况百出,问题接踵而来!结果,此教程也变得异常复杂难懂!!!(写得比较匆忙,后续将持续更新发现的问题)
所以,在本文最后,张戈温馨提醒一下:
如果你博客用了多说,如果你博客没有什么已登录状态的判断代码,那么这个方法会比较简单!
如果你比较会折腾代码,也看懂了本文,那么这个方法依然适合你!
如果你不懂代码,而且还不容易接受新事物,那么请不要轻易去尝试本文分享的方法,否则也真是醉了。。。
早知道这么麻烦,我还是继续用WP Super Cache插件比较靠谱!想跃跃欲试的博友,最好先考虑清楚咯。。。。
本文代码归张戈版权所有,逍遥乐IT博客仅作转载,如果大家有什么疑问,或者后续跟进,请到
原文:张戈博客《WP Super Cache静态缓存插件纯代码版(兼容多域名网站)》 跟进。
正如张戈所说,这段代码仅给那些具有一定代码基础的人,小白和新人请勿尝试!


最新评论